

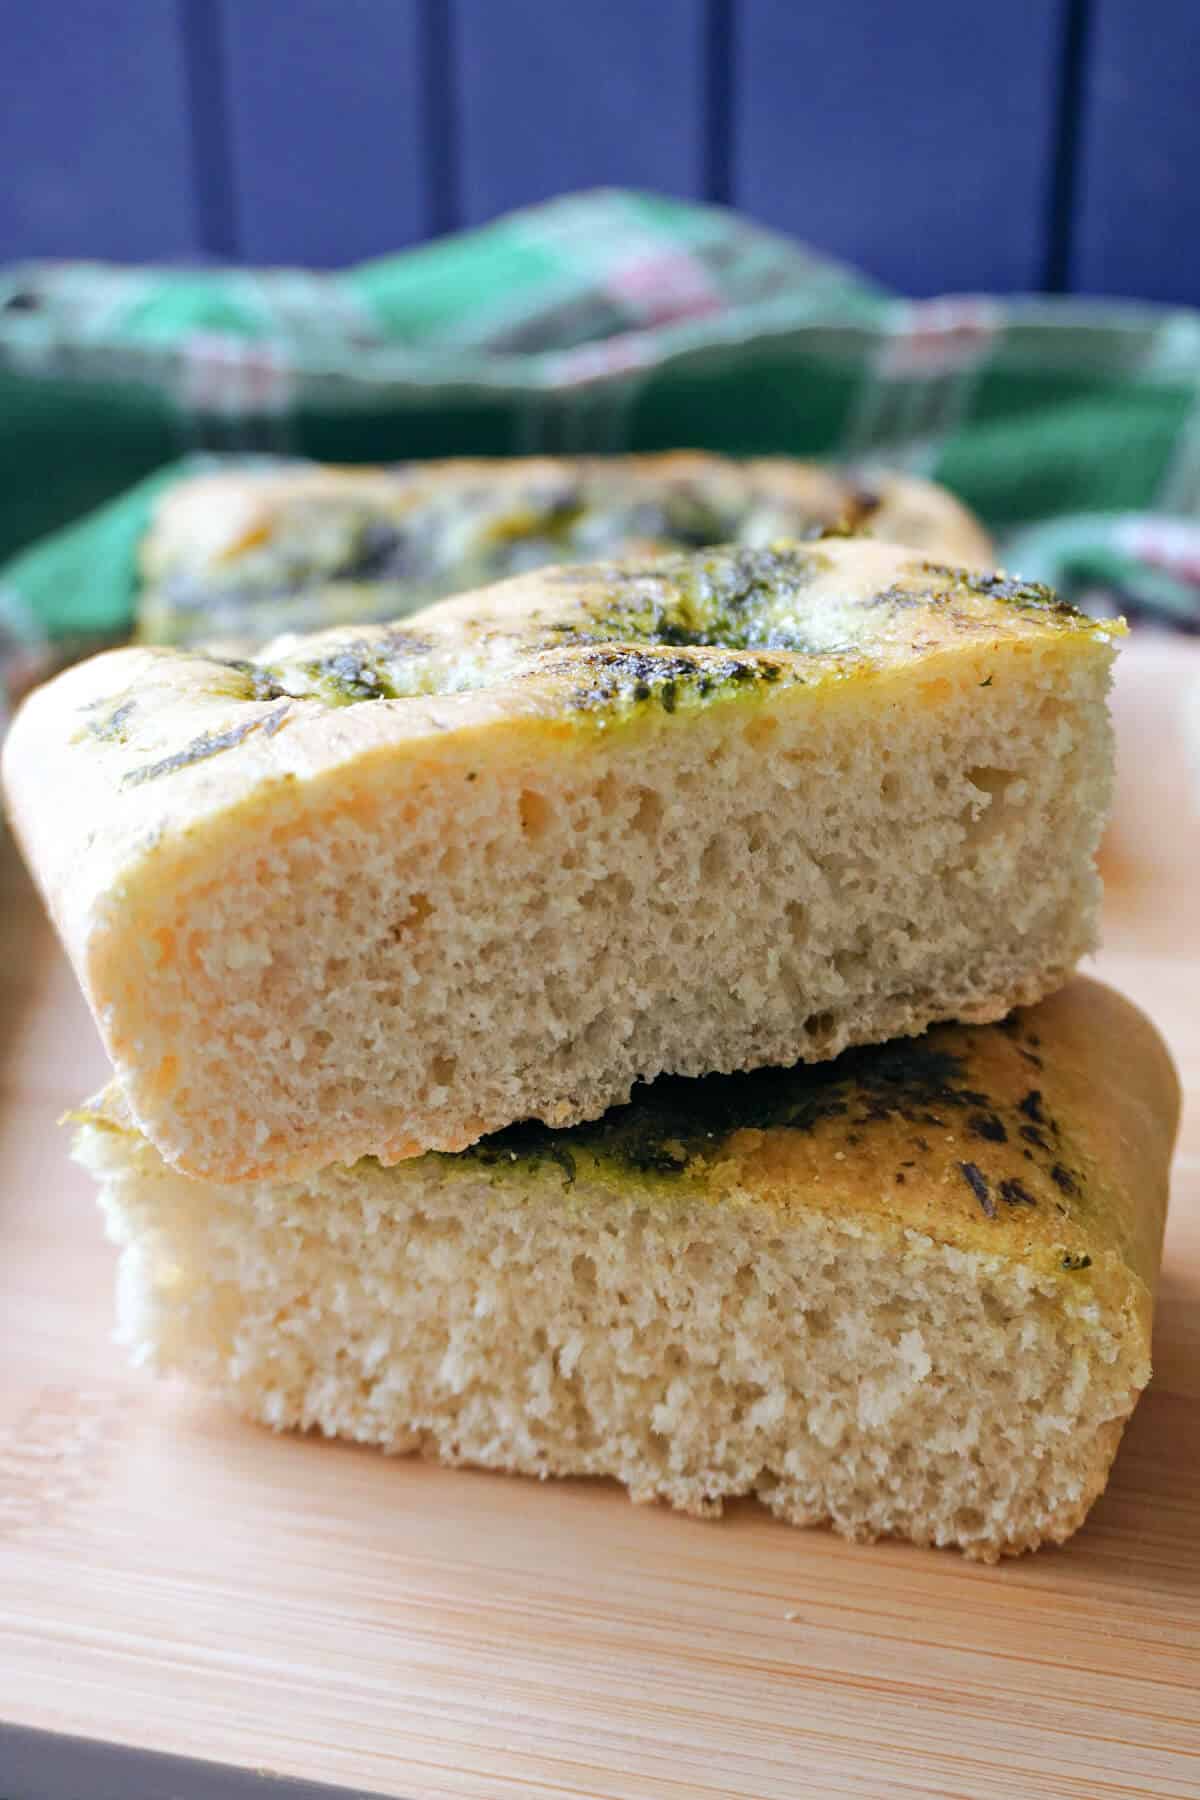
Wild Garlic Focaccia, a lovely Spring twist on the classic Italian bread. A pillowy soft bread with a golden crust and the signature dimples, topped with a generous vibrant mixture of olive oil, wild garlic and a generous pinch of ground black pepper, what a treat this is! It's the perfect bread of Spring grazing, sharing or simply enjoying it dipped in olive oil.

It's Spring, which means wild garlic season is here! At this time of the year, the woodland paths near my house transform into a sea of vibrant green as wild garlic, or Stinking Roger or Stinking Rogers, as it's commonly named on the Isle of Man, makes an appearance.
Unlike regular garlic, which is known for its pungent smell and taste, the wild garlic is a lot more mild, and it adds a lovely garlic touch to Spring dishes. Foraging it is wonderfully satisfying, and a great activity to get kids involved in.
I added it to my Stinging Nettle Soup too, which is my absolute favourite soup at this time of the year. And this gorgeous wild garlic focaccia is the perfect side to enjoy to soup with.
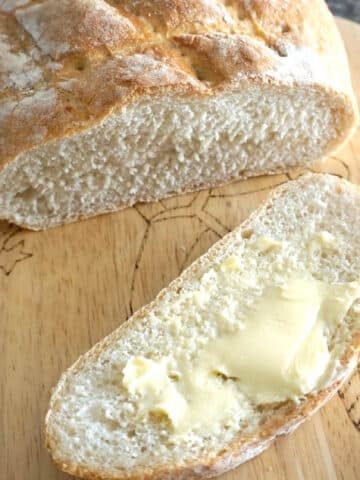
Focaccia is well known for its beautifully golden crust, dimples that hold generous puddles of olive oil and beautifully light and fluffy texture. I have a rosemary focaccia recipe too, which is as delicious.
It's a lovely recipe to add to your Easter Dinner Menu too, it can be served alongside other delicious side dishes, or as an appetizer to dip into an olive oil bread dip and/or chilli oil - it's absolutely divine!
Jump to:
Note!
Go to the recipe card at the bottom of the post for exact quantities and detailed instructions!
Ingredients overview - the bread
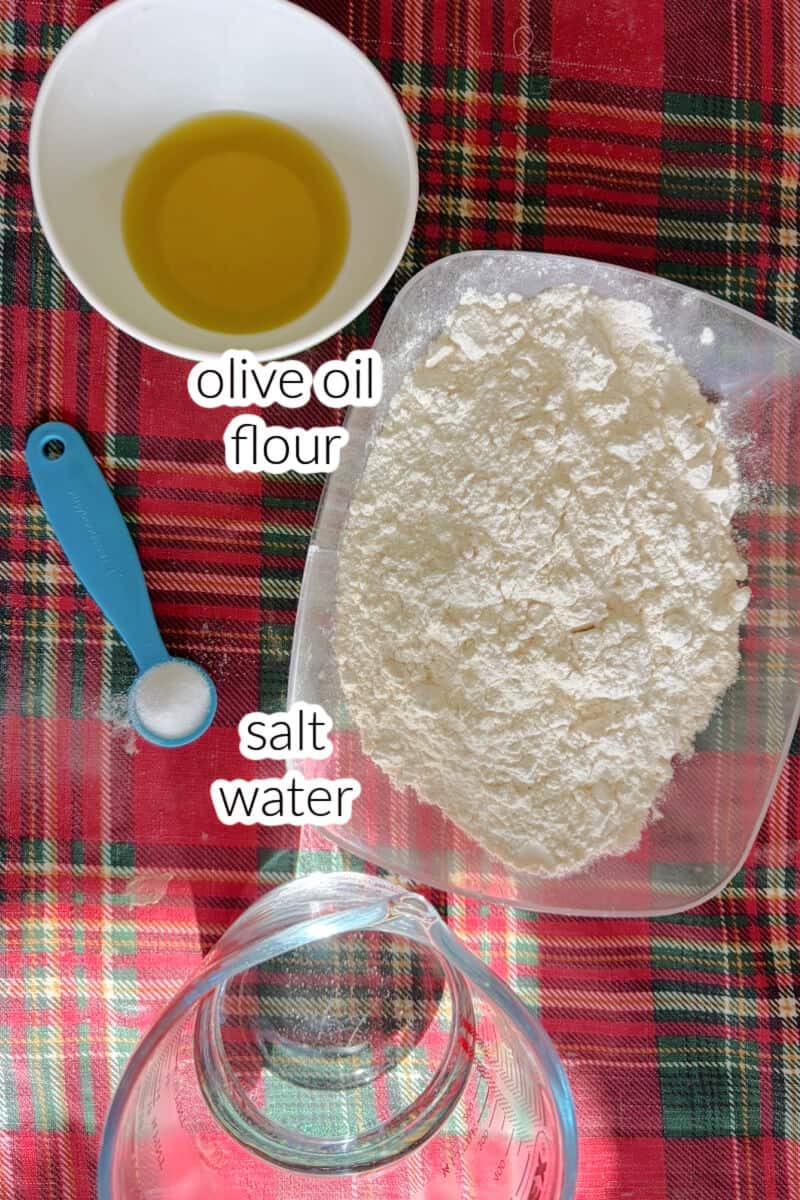
- flour - white bread flour gives the best results, as it develops more gluten than regular white flour, so you get a lighter, fluffier texture
- olive oil - use the best quality possible, you will 100% notice the difference in taste
- water - make sure you use luke warm water, hot water will kill the yeast, while cold water till not activate the yeast as well
- yeast - I used dried fast-action yeast
- salt - regular salt is just fine
Ingredients overview - the topping

- wild garlic - choose fresh, vibrant leaves, ideally before flowers pop up, as I find that older wild garlic has a bitter taste
- olive oil - extra virgin olive oil is the best
- water - cold water is just fine
- salt & ground black pepper - enhance the wild garlic flavour
Step-by-step photos and instructions
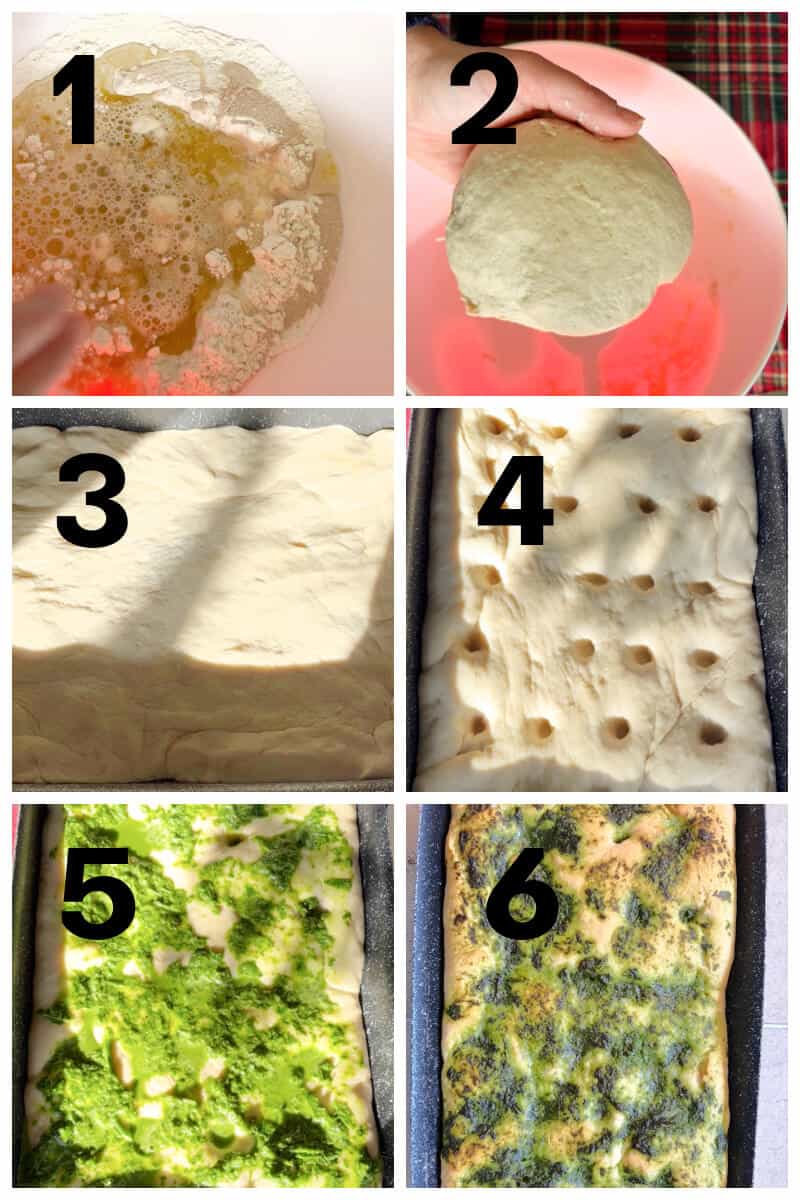
- to make the topping, add all the ingredient to a blender or food processor, and blitz to get a chunky mixture

- to make the bread, sift the flour in a large mixing bowl, add the yeast, salt, warm water and olive oil, and knead well to get a slightly sticky, soft dough - add more flour if necessary
- allow the dough to prove in a warm place until it doubles its volume
- flour or oil a rectangle baking tray ( mine is 30 x 22 x 5 cm / 12 x 9 x 2 inches)
- use your hands to gently stretch the dough until it fits onto the baking tray
- leave it to prove for a second time, making 30 minutes
- use your fingers to poke the dough in several places, then top with the wild garlic mixture
- bake in the preheated oven at 220 degrees Celsius (430 Fahrenheit) for 20 minutes
Expert tips
To achieve the best results, you must prove the dough in a warm place, not only it speeds up the proving time, but it also helps rise well enough for a light and airy bread.
I usually turn the oven on on the lowest possible temperature for 5-10 minutes, switch it off, then prove the dough in there. Make sure the oven doesn't get too hot, as the dough will flatten rather than rise.
If the dough proves in a cold place, you will have to wait for a long longer for it to double its size, and most of the times, the yeast simply doesn't activate. An underproof dough will be tough and flat.
Make sure your yeast is still active, if you are unsure, add the warm water to a jug, add the yeast and a tablespoon of flour and one of sugar, give it a stir, and set it aside for 10-15 minutes - if the mixture is frothy, the yeast is good to use.
Then simply add the mixture to the sifted flour, add the oil and knead as usual. I knew that the yeast was good, so I simply added it to the flour, but that's a good way to know if it's active.
Other yeast bread recipes

If you’ve liked this recipe or any other recipe on the blog then don’t forget to rate the recipe and let me know how you got on in the comments below, I love hearing from you! You can also FOLLOW ME on FACEBOOK, INSTAGRAM , YOUTUBE, TIK TOK , FLIPBOARD and PINTEREST to see more delicious food and what I’m getting up to.

Wild Garlic Focaccia
Ingredients
For the topping
- 25 g wild garlic (1 oz)
- 30 ml extra virgin olive oil (1 oz)
- 30 ml cold water (1 oz)
- ¼ teaspoon salt
- ¼ teaspoon ground black pepper
For the bread
- 350 g white strong bread flour (12 oz)
- 200 ml warm water (7 oz)
- 1 teaspoon salt
- 2 teaspoon dried fast-action yeast
- 2 tablespoon extra virgin olive oil
Would you like to save this?
Instructions
- To make the topping, add all the ingredients to a blender or food processor, and blitz to a chunky texture.
- To make the bread, sift the flour in a large mixing bowl, add the yeast, salt, warm water and olive oil, and knead well until you get a smooth, slightly sticky dough that springs back - add more flour if necessary.
- Shape the dough into a ball, brush it with olive oil, cover the bowl with a kitchen towel, and prove in a warm place for 2 hours or until it doubles its size.
- Flour or oil a rectangle baking tray ( mine is 30 x 22 x 5 cm / 12 x 9 x 2 inches), and use your hands to gently stretch the dough to fit onto the baking tray.
- Prove it again for 30 minutes, then use a finger to poke several holes in the dough.
- Spread the wild garlic mixture over the top, and bake in the preheated oven at 220 degrees Celsius (430 Fahrenheit) for 20 minutes.
Video
Notes
- To achieve the best results, you must prove the dough in a warm place, not only it speeds up the proving time, but it also helps rise well enough for a light and airy bread.
- I usually turn the oven on on the lowest possible temperature for 5-10 minutes, switch it off, then prove the dough in there. Make sure the oven doesn't get too hot, as the dough will flatten rather than rise.
- If the dough proves in a cold place, you will have to wait for a long longer for it to double its size, and most of the times, the yeast simply doesn't activate. An underproof dough will be tough and flat.
- Make sure your yeast is still active, if you are unsure, add the warm water to a jug, add the yeast and a tablespoon of flour and one of sugar, give it a stir, and set it aside for 10-15 minutes - if the mixture is frothy, the yeast is good to use
- Then simply add the mixture to the sifted flour, add the oil and knead
Leave a Reply